
FIND YOUR NEXT EXPERIENCE. SHARE YOUR NEXT EVENT.
Good Local Experiences Start Here
Looking for something to do, or planning an event of your own? Choose your path below. You can browse events without creating an account.
For Event Goers
From “what should we do?” to a plan worth looking forward to.
1. Find Something You’ll Enjoy
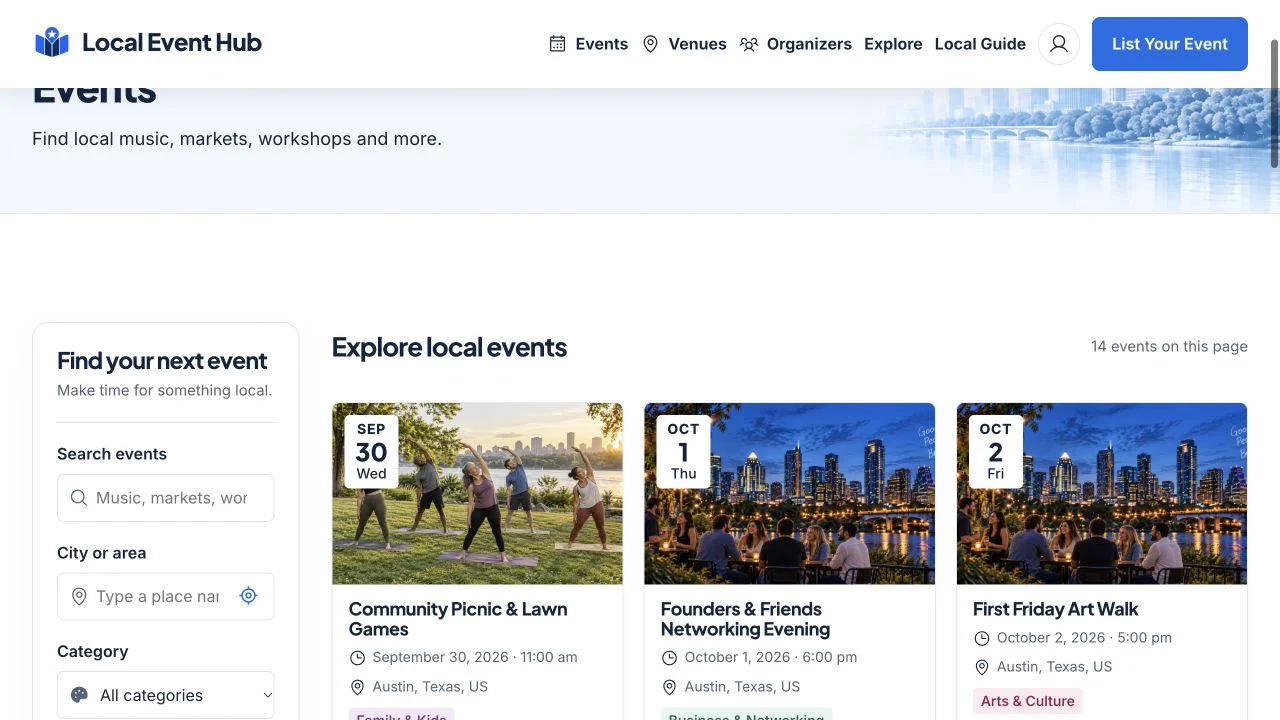
Open Events and type what interests you, such as music or workshops. Choose a city or area, then add a date or category if you want to narrow the results.
Filters update the results as you choose them. Use Free or Paid, select more than one attendance type, or clear the dates to browse without a date limit. No results? Remove a filter or try a wider area.
2. Check the Details Before You Go
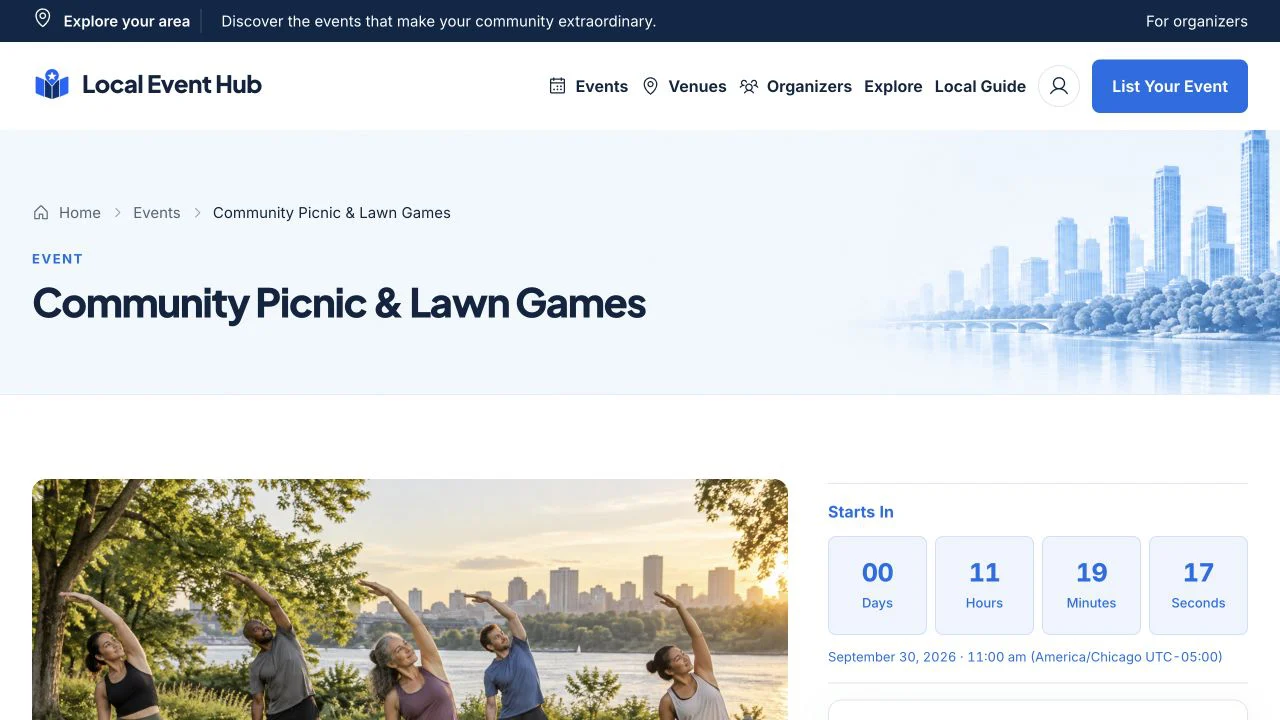
Open an event to check its local date and time, venue, attendance type and ticket information. Visit the organizer or venue profile to learn more.
Use the registration or ticket link shown on the event when you are ready. You may be taken to the organizer’s own website. Check the latest information there before travelling or paying.
3. Save the Plan and Bring Someone Along
Use the calendar or sharing options where available. Send the event link to a friend so they can check the same details. If the event has changed or information is missing, use its organizer or source link to confirm it.
For Organizers
Give your event a place people can discover, then manage it from your own workspace.
1. Create Your Account and Profile
Create an organizer account, confirm your email and sign in. Your Overview explains whether publishing is enabled or your account is waiting for approval.
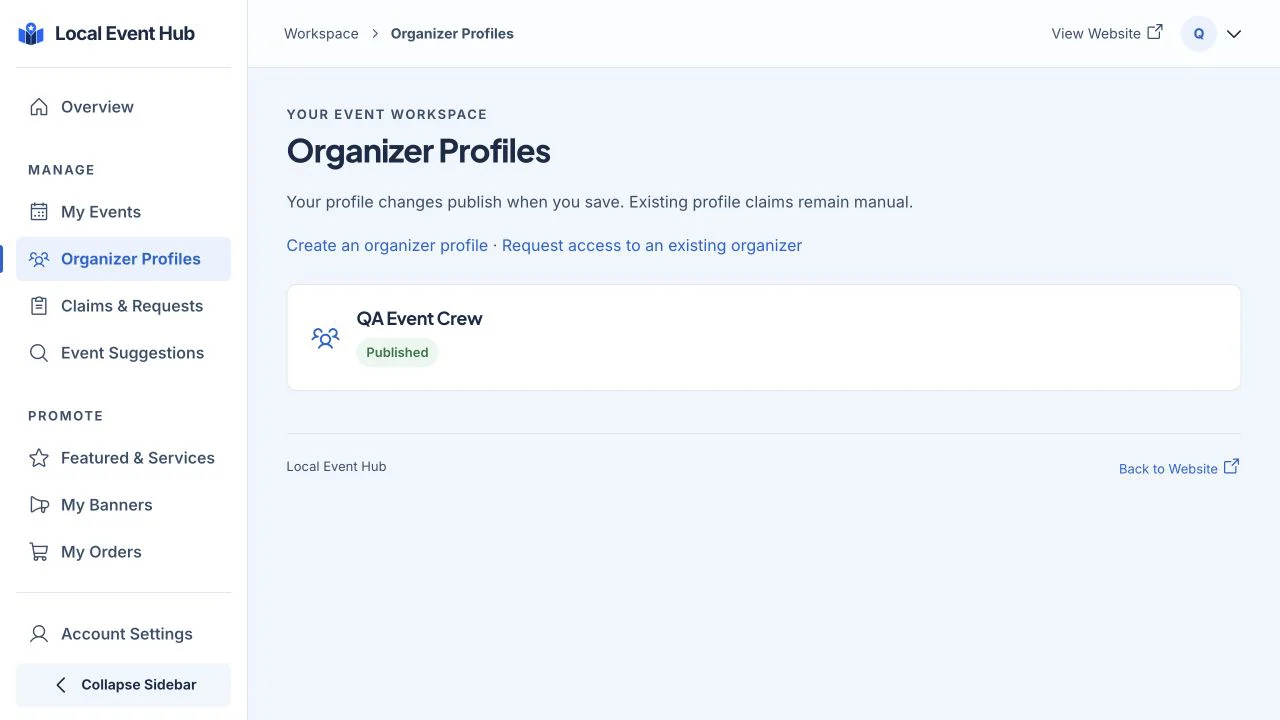
Add an organizer profile with a recognizable name and a short introduction. Already listed here? Request access to the existing organizer or event and explain your role. The site team reviews every claim before giving access.
2. Add Your Event, One Step at a Time
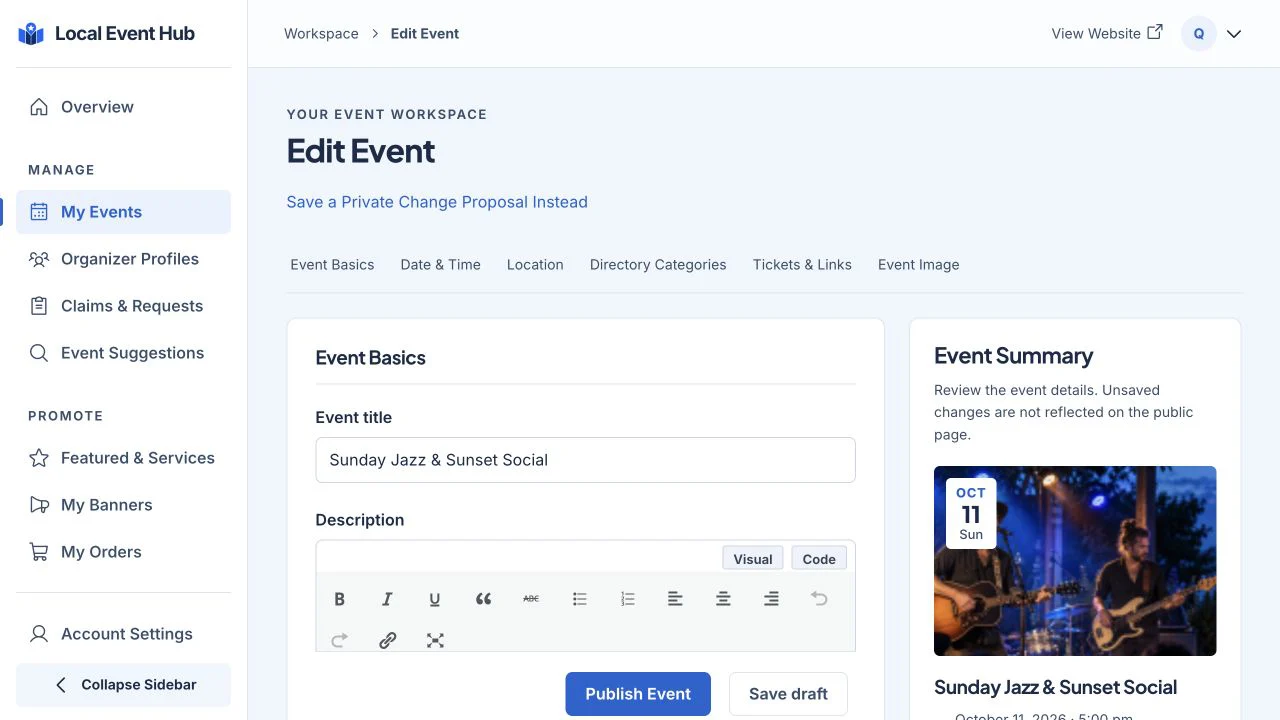
In My Events, choose Add Event. Explain what guests can expect, then add confirmed dates, location, categories, a photo and the registration link.
Save a draft if you are not ready. When finished, use the publish or review action offered to your account. Come back to My Events to edit the listing or check its status.
3. Choose a Promotion When You Need It
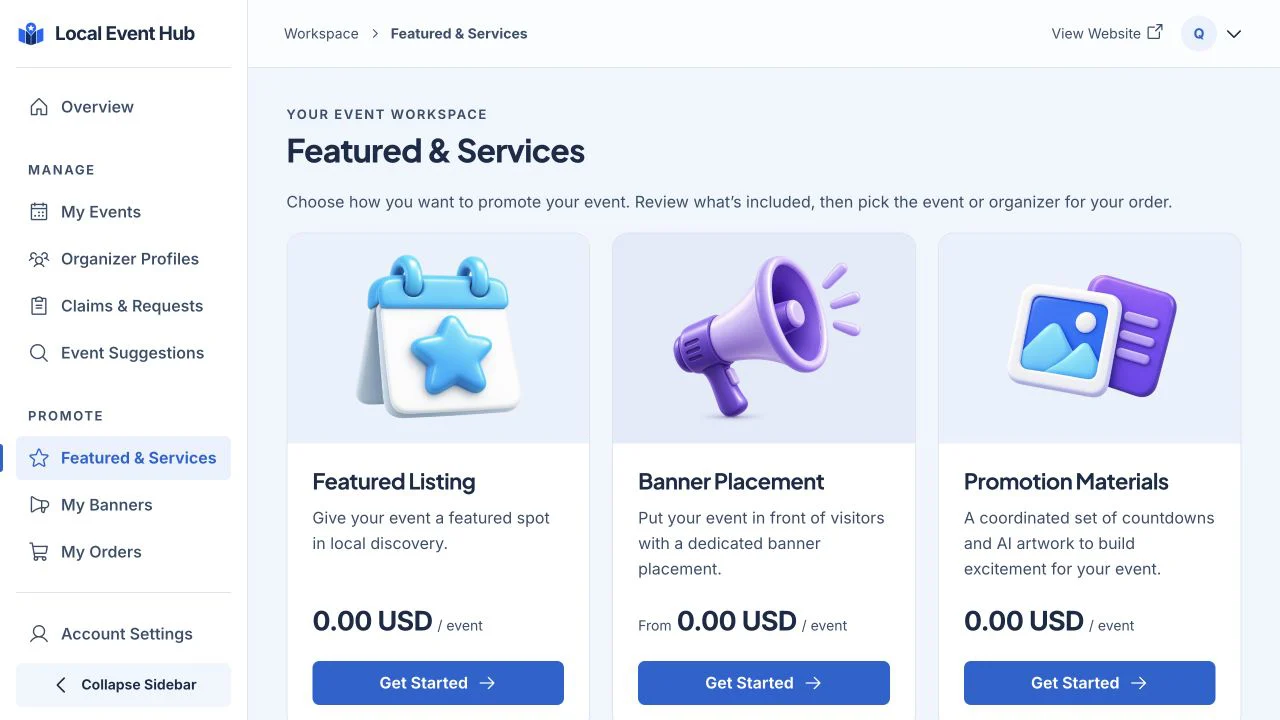
Open Featured & Services to see the options enabled on this site. Choose Get Started, read what is included and select your event or organizer. Review the current price and order summary before checking out.
My Orders keeps the purchase details, promotion dates and available materials together. A promotion pack has two parts: countdown template images and separate AI promotion images. Download the finished images, review them and share them yourself.
A Few Helpful Answers
Do I need an account to browse events?
No. You can browse the public directory and read event details without signing in. An organizer account is for managing listings and promotions.
Does a claim get approved automatically?
No. Claims for existing organizers or events always go to the site team for review. Confirming your email is a separate step.
Will buying a service publish or promote my event everywhere?
No. Each offer explains exactly what it includes. Your event still needs to meet the site’s publication requirements. Downloaded images are for you to share; they are not automatically posted to social media.
Where can I get more help?
After signing in, open Help & Tutorials in your workspace. You will find illustrated instructions and a short guided tour. If your account or claim needs a decision, contact the site team.